Electric Stove Temperature 1- 10 : What Number is Simmer ? (1-9 Guide Tool)
Updated: 2 May 2026
1921
What temperature is simmer on electric stove ? on most electric stoves, simmers is around setting 2-3 on a 1-10 dial, although the exact setting varies by stove. this guide explains electric stove temperatures from 1-10, including low, high , medium, medium high , high heat, and the best setting for simmering.
Getting your electric stove’s simmer temperature right is the critical dividing line between culinary perfection and kitchen disaster. Set the burner too high, and delicate tomato sauces scorch to the pan bottom, braised beef turns chewy and tough, and white rice boils dry into a crusty, charred mess.
Set it too low, and your cooking liquid drops below the threshold required to gelatinize starches, break down tough collagen, or reduce pan reductions into glossy glazes. In this authoritative master guide, we deconstruct the thermal physics of electric stove simmering, provide definitive dial setting conversion charts for every major appliance manufacturer, break down the culinary temperature spectrum from poaching to rolling boil, and reveal professional techniques to conquer electric heat cycling once and for all.
If you’re wondering what temperature is simmer on electric stove, aim for gentle bubbling rather than a full boil.
- 1. Quick Answer: What Number is Simmer on Electric Stove Dials?
- 2. The Thermal Spectrum: Poaching vs. Simmering vs. Boiling in °F and °C
- 3. Master Brand Dial Conversion Guide (1–10, 1–9, and 1–6 Scales)
- 4. Electric Coil vs. Radiant Glass vs. Induction: Thermal Cycling Mechanics
- 5. Cookware Material Matters: Why Pan Thickness Dictates Simmer Success
- 6. The Visual Cue Test: How to Tell Exactly When You Are Simmering
- 7. Troubleshooting Common Electric Stove Simmer Headaches
- 8. Simmering by Recipe: Ideal Heat Targets for Rice, Sauces, Soups & Braises
- 9. Frequently Asked Questions (FAQ)
What Temperature is Simmer on Electric Stove?
For cooks needing an immediate, reliable answer right at the stove:
🔥 Executive Simmer Cheat Sheet:
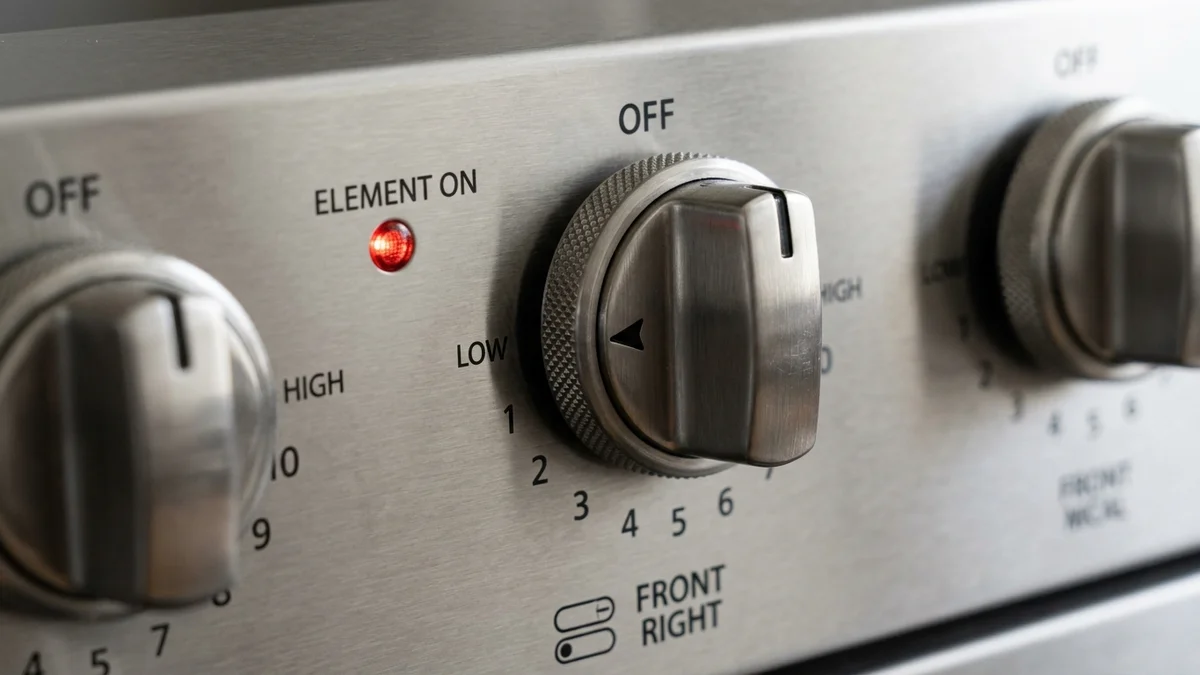
- On a 1 to 10 Numbered Dial (Whirlpool, GE, Frigidaire, LG): Simmer is located between 2 and 3 (specifically 2.5 for a steady, gentle simmer).
- On a 1 to 9 Numbered Dial (Bosch, Samsung, KitchenAid): Simmer is setting 2 (for delicate simmer) to 3 (for a rapid, full simmer).
- On a 1 to 6 Numbered Dial (European & Compact Ranges): Simmer is located at setting 1.5 to 2.
- On Text-Labeled Dials (LO, MED, HI): Simmer sits directly between LOW and the first graduation toward Medium-Low.
- Actual Cooking Liquid Temperature: A true culinary simmer maintains liquids between 185°F and 205°F (85°C to 96°C), just below water’s boiling point of 212°F (100°C).
Crucially, “LOW” is NOT the same as “Simmer” on an electric stove. Setting your dial to Low (Setting 1) typically outputs only enough thermal energy to hold already-cooked food between 140°F and 165°F (a warming zone) or melt butter and chocolate without separation. To actively extract flavors, soften starches in rice, and tenderize braised meats, liquid requires the continuous convective energy found within the 185°F–205°F simmer envelope.
2. The Thermal Spectrum: Poaching vs. Simmering vs. Boiling in °F and °C
Cooking liquids do not simply transition from cold water to boiling steam. In professional culinary science, water and cooking stocks pass through four distinct thermal zones, each serving a unique chemical and physical purpose in recipe execution.
Knowing what temperature is simmer on electric stove helps prevent sauces, soups, and other foods from boiling too aggressively.
| Cooking State | Temperature (°F) | Temperature (°C) | Visual & Surface Activity | Ideal Recipe Applications |
|---|---|---|---|---|
| Poaching (Sub-Simmer) | 160°F – 180°F | 71°C – 82°C | Delicate wisps of steam; motionless liquid; zero bubbles breaking surface. | Poaching eggs, tender salmon fillets, chicken breast, fruit compotes. |
| Gentle Simmer (Low Simmer) | 185°F – 195°F | 85°C – 90°C | Occasional small bubbles lazily rising from pot bottom; gentle surface shimmering. | White rice, long-simmered bone broth, delicate cream sauces, béchamel. |
| Rapid Simmer (Full Simmer) | 195°F – 205°F | 91°C – 96°C | Continuous stream of moderate bubbles breaking surface throughout entire pot; steady steam. | Beef stews, marinara sauce reduction, chili, pot roasts, braised short ribs. |
| Rolling Boil | 212°F+ | 100°C+ | Violent, aggressive large bubbles rolling across surface; does not stop when stirred. | Boiling dry pasta, blanching green vegetables, hard-boiling eggs, canning. |
Understanding these thermal thresholds prevents culinary errors. For instance, according to residential energy research compiled by Energy Star, keeping liquids at a gentle simmer consumes up to 45% less electrical energy than maintaining an unnecessary rolling boil, while preserving significantly more heat-sensitive vitamins and aromatics.
What temperture is simmer on electric stove setting ? for most models , a setting around 2-3 is a good starting point .
3. Master Brand Dial Conversion Guide (1–10, 1–9, and 1–6 Scales)
Unlike ovens which feature calibrated digital thermostats, electric stovetop dials do not regulate exact internal pan temperatures. Instead, they govern an internal infinite heat switch that controls the percentage of time the heating element receives electrical current. Depending on your range manufacturer, the numbering system on your knobs varies substantially:
| Appliance Manufacturer | Dial Scale | Keep Warm / Melt | Gentle Simmer (185°F–195°F) | Rapid Simmer (195°F–205°F) | Medium Sauté |
|---|---|---|---|---|---|
| GE Appliances & Profile | 1 to 10 (or LO–HI) | LO – 1 | 2 to 2.5 | 3 | 5 to 6 |
| Whirlpool & Amana | 1 to 10 | 1 (Melt) | 2 to 3 | 3.5 | 5 to 6 |
| Frigidaire & Electrolux | 1 to 10 (or LO–6) | LO | 2 | 2.5 to 3 | 4 to 5 |
| Samsung Radiant & Induction | 1 to 9 (or 15-step touch) | 1 to 1.5 | 2 to 2.5 | 3 to 3.5 | 5 to 6 |
| LG Smart Stoves | 1 to 10 (or UltraHeat) | 1 (Warm) | 2 to 3 | 3.5 | 5 to 6 |
| Bosch & European Cooktops | 1 to 9 (with half-steps) | 1 to 1.5 | 2.0 to 2.5 | 3.0 | 4.5 to 5.5 |
| KitchenAid Electric & Induction | 1 to 9 (or Even-Heat) | 1 (Melt) | 2 to 2.5 (Simmer) | 3 | 5 to 6 |
If you are exploring commercial-style burner power or comparing dual-fuel configurations with gas cooktops, our in-depth KitchenAid Gas Range Review and Café Induction Range Review provide comprehensive feature breakdowns across different heating technologies.
When determining which temperature is simmer on electric stove controls, watch the food rather than relying only on the dial number
4. Electric Coil vs. Radiant Glass vs. Induction: Thermal Cycling Mechanics
The single greatest obstacle to achieving a stable simmer on an electric stovetop is duty cycling. Understanding how your specific electric cooking surface handles heat dissipation is the secret to mastering simmer control.
Traditional Exposed Electric Coil Burners
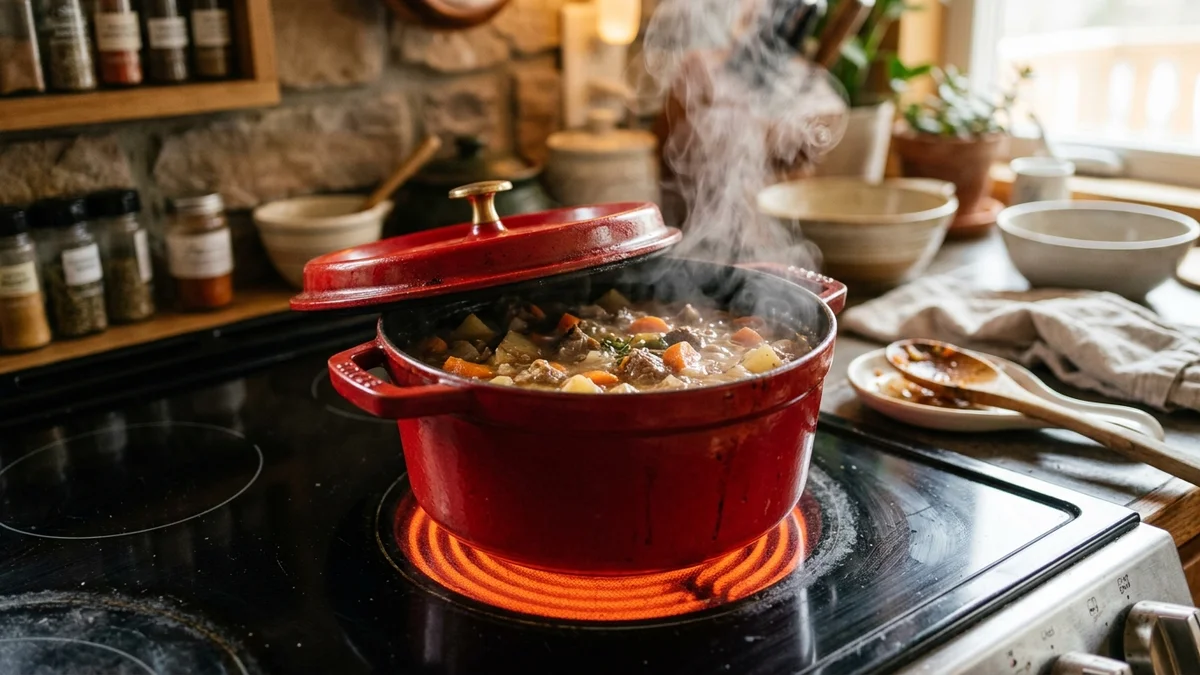
Electric coil elements consist of a coiled nickel-chromium resistance wire insulated inside a stainless steel casing. When set to setting 2.5, the coil does not emit 25% continuous heat; rather, an internal bi-metallic thermostat switch cycles the coil 100% ON for roughly 15 seconds, and then completely OFF for 45 seconds.
This causes what culinary instructors call “simmer surge”—your chili boils vigorously for 12 seconds while the coil glows red, then goes completely flat when the element clicks off. To stabilize this effect, you must rely on heavy cookware to act as a thermal battery.
Radiant Smooth Glass-Ceramic Cooktops
Smooth-top electric ranges feature ribbon-filament heating coils mounted beneath a sheet of polycrystalline ceramic glass (often Schott Ceran). Glass-ceramic has extraordinarily high vertical thermal conductivity and low horizontal conductivity, but it retains residual heat for up to 25 minutes after being turned off.
Crucial Pro Tip: When you bring a soup to a boil on high heat and turn the knob down to 2, the ceramic glass remains at over 400°F for several minutes. If you leave your pot in place, the residual glass heat will continue boiling your food for five minutes.
Always slide your pot partially off-center for 90 seconds after dropping the dial to setting 2 to allow the glass to cool down to the true simmer equilibrium.
Understanding what temperature is simmer on electric stove settings helps prevent sauces and soups from boiling too aggressively.
Induction Cooktops
Induction surfaces bypass thermal elements entirely, using copper magnetic coils to induce eddy currents directly within the ferrous iron base of your pan. Because the glass does not generate the heat, induction offers instantaneous thermal response that rivals or exceeds commercial gas ranges. For an exhaustive analysis of burner responsiveness, read our comprehensive guide on gas vs electric vs induction stove performance.
5. Cookware Material Matters: Why Pan Thickness Dictates Simmer Success
On an electric stove, your cookware is not merely a vessel—it is an active component of the heating system. Because electric elements deliver heat in cyclical bursts rather than an uninterrupted flame, the metallurgy of your pot determines whether that heat distributes evenly or scorches your ingredients.
- Enameled Cast Iron (Le Creuset, Lodge, Staub): The undisputed king of electric stove simmering. Cast iron has low thermal conductivity but massive heat capacity (thermal mass). Once heated through, it absorbs the aggressive on/off pulses of electric coil and radiant elements and radiates a velvety, completely steady 190°F heat across the entire bottom and sides of the pot.
- Tri-Ply Fully Clad Stainless Steel (All-Clad D3/D5): Features a responsive aluminum or copper core sandwiched between interior and exterior layers of durable stainless steel. The thick aluminum core rapidly wicks heat away from localized hot spots above the element coils, preventing hot-spot burning when simmering thick stews.
- Hard-Anodized Heavy-Gauge Aluminum: Excellent heat conduction that spreads heat twice as fast as stainless steel, making it ideal for delicate dairy-based sauces that burn easily.
- Thin Stamped Non-Stick / Enamel-on-Steel: The primary culprit of burnt food on electric ranges. Thin stamped pans (under 2mm thickness) transmit electric thermal cycling directly into your food with zero dampening. When the element pulses on, the pan bottom instantly spikes past 300°F, caramelizing and scorching the bottom layer before the liquid can convect away.
If you are shopping for budget-friendly cookware or entry-level stoves with dependable simmer zones, check our Budget Gas Stove Buying Guide for smart consumer tips on heat distribution.
6. The Visual Cue Test: How to Tell Exactly When You Are Simmering
While an instant-read digital culinary thermometer is the most scientific tool to verify a 185°F–205°F simmer, seasoned chefs rely primarily on sensory observations:
if you’re wondering what temperature is simmer om electric stove setting, most electric stoves simmer around setting 2-3, although the exact setting varies by model.
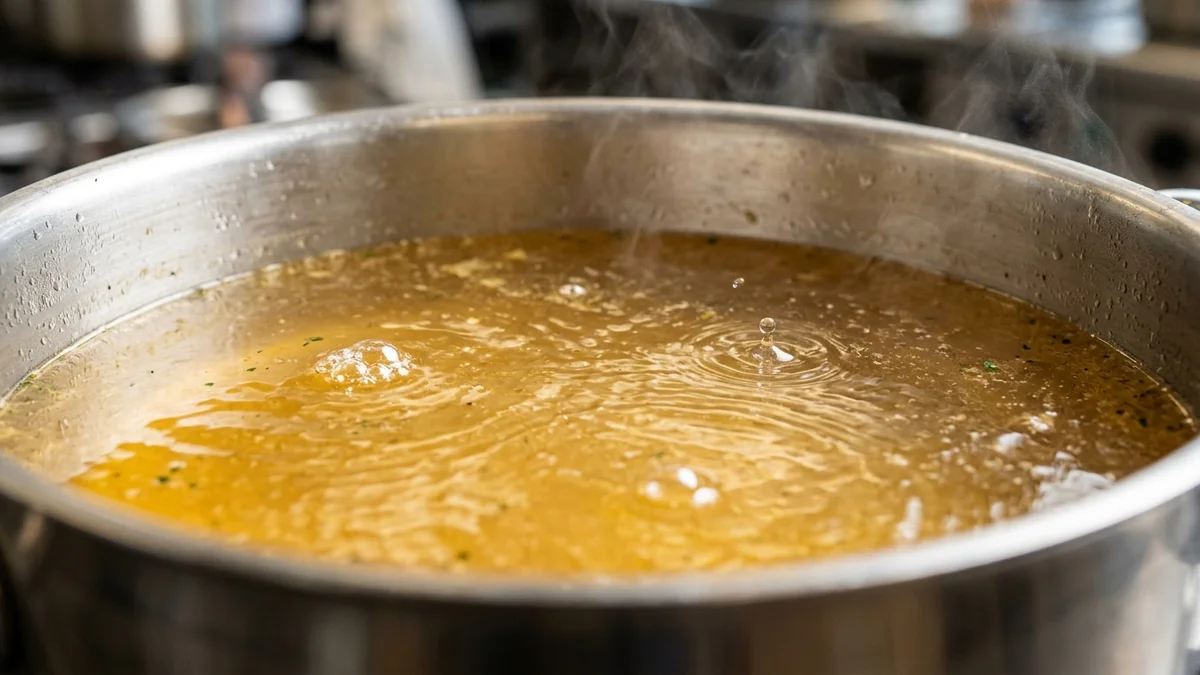
👀 Visual Cues of a True Simmer
- Small Bubbles (Champagne Beads): Pinprick bubbles rising gently from the bottom of the pan, popping calmly at the surface.
- Gentle Surface Shimmer: The surface of the liquid trembles with delicate movement rather than violently sloshing.
- Soft Steam Plumes: A steady, lazy vapor rises without the aggressive whistling hiss associated with a boil.
- Stirring Test: Stirring the liquid with a wooden spoon briefly pauses the bubble formation for 3–5 seconds before gently resuming.
⚠️ Warning Signs of an Overheated Simmer
- Rolling Surface: Large, turbulent bubbles breaking continuously across the entire liquid expanse.
- Liquid Splattering: Splashes escaping the pot rim or spraying onto the cooktop glass.
- Rapid Evaporation: Liquid volume decreasing noticeably within 5 to 10 minutes.
- Acrid Scorching Smell: Sugars in onions, garlic, or tomatoes sticking to the base, indicating the element is pulsing too intensely.
7. Troubleshooting Common Electric Stove Simmer Headaches
Problem 1: “My Pot Keeps Boiling Even on Setting 2!”
The Root Cause: On smooth ceramic glass cooktops, bringing a pot to a boil on setting 8–9 superheats the glass beneath the pan to over 500°F. When you drop the knob to 2, the glass holds that thermal reservoir for 5 to 8 minutes, causing the liquid to boil aggressively despite the lower dial setting.
The Fix: Shift the pot half-way off the burner ring for 60 to 90 seconds immediately after lowering the dial. This allows the pan to shed excess heat while the ceramic element cools down to its lower duty cycle.
Problem 2: “Setting 2 Stops Bubbling Completely, But Setting 3 Boils!”
The Root Cause: You have encountered the infamous electric infinite-switch dead zone, where the gap between duty cycles is too wide for your specific pot size.
The Fix: Use the “Vented Lid Technique.” Place the dial on setting 3, but position the pot lid slightly ajar (leaving a quarter-inch gap). The venting lid lets just enough convective heat and steam escape to keep the temperature locked between 195°F and 200°F without crossing into a rolling boil.
Problem 3: “My Tomato Sauce or Chili Always Burns on the Bottom!”
The Root Cause: Thick liquids have high viscosity, preventing natural convection currents from carrying heat away from the bottom of the pot. When an electric burner pulses on, the dense layer of sauce in direct contact with the bottom burns before the top layer warms.
The Fix: Purchase a cheap cast-iron or aluminum heat diffuser plate (flame tamer). Placed directly between the electric burner and your pan, a heat diffuser spreads the concentrated electric pulses evenly across the entire surface, providing foolproof scorching protection.
Safety is also paramount when operating unattended electric simmering pots. According to home safety standards set by the National Fire Protection Association (NFPA), unattended cooking remains the leading cause of home structure fires. Never leave long-simmering stocks or braises on an electric range without periodically inspecting liquid levels and element stability.
8. Simmering by Recipe: Ideal Heat Targets for Rice, Sauces, Soups & Braises
Different culinary ingredients require tailored simmering temperatures to achieve peak flavor, tender texture, and proper emulsion:
- Fluffy White & Brown Rice: Bring water and rice to a rolling boil on High (setting 8–9). The moment boiling starts, drop the dial straight down to Setting 2 (Gentle Simmer, 185°F), cover with a tight-fitting lid, and do NOT remove the lid for 18 minutes. At this temperature, the rice absorbs moisture evenly without drying out or burning the bottom layer.
- Rich Beef Stews & Pot Roasts (Braising): Tough cuts of meat like chuck roast, brisket, and shank require prolonged heat between 185°F and 200°F (Setting 2.5). Within this specific window, tough connective collagen slowly dissolves into gelatin without causing the muscle fibers to seize into hard, dry knots.
- Sunday Marinara & Bolognese: Simmer uncovered on Setting 2 to 3 (Rapid Simmer, 195°F–200°F). This allows water vapor to evaporate steadily, concentrating natural tomato sweetness and emulsifying olive oil without burning sugars.
- Chicken Broth & Pho Stock: Maintain a gentle simmer at Setting 2 (185°F–190°F). Boiling a stock emulsifies rendered fat and protein particles back into the broth, resulting in cloudy, greasy soup. Keeping it at a gentle simmer preserves crystal-clear clarity.
- Outdoor & Camp Cooking Alternatives: If you are replicating outdoor campfire stews or high-capacity outdoor canning, compare your kitchen range against the immense 60,000 BTU output featured in our Camp Chef Explorer 2 Burner Stove Review.
- if you’re not unsure what temperature is simmer on electric stove cooking requires, start low and adjust gradually until you see gentle bubbling.
9. Frequently Asked Questions (FAQ)
What number is simmer on an electric stove 1 to 10?
On electric ranges with dials numbered 1 to 10 (such as Whirlpool, GE, Frigidaire, and LG), simmer is setting 2 to 3. For delicate foods like white rice or cream sauces, dial to 2 or 2.5. For thicker chilis or marinara reductions that require active steam evaporation, set the dial to 3.
What number is simmer on an electric stove 1 to 9?
On ranges with 1 to 9 numbering (including Bosch, Samsung, and KitchenAid models), simmer is setting 2 for a gentle simmer (185°F–195°F) and setting 3 for a rapid simmer (195°F–205°F). Setting 1 is reserved exclusively for Keep Warm or butter melting.
Is Low the same as Simmer on an electric stove?
No. LOW (Setting 1) is an idle warming setting that typically holds food between 140°F and 165°F to keep cooked dishes warm for serving without continuing to cook them. Simmering occurs between 185°F and 205°F (Settings 2 to 3), which is required to cook grains, tenderize meats, and thicken reductions.
Can you simmer at the lowest setting on an electric stove?
Generally, no. The lowest setting on an electric stove does not provide enough heat flux to keep liquids above 180°F unless your pot is heavily insulated with a tight lid. However, on highly efficient induction cooktops or when using a heavy enameled cast-iron Dutch oven, the lowest setting can occasionally sustain a very faint poaching temperature.
Should you simmer with the lid on or off?
Simmer with the lid ON when you want to retain liquid and cook through solid ingredients evenly, such as rice, braised meats, and root vegetable soups. Simmer with the lid OFF when you want moisture to evaporate and sauces to thicken, such as tomato marinara, gravies, and pan reductions.
What temperature is simmer in Fahrenheit and Celsius?
In Fahrenheit, culinary simmering occurs between 185°F and 205°F. In Celsius, simmering occurs between 85°C and 96°C. Below 185°F is considered poaching (160°F–180°F), while at 212°F (100°C) the liquid reaches a full rolling boil.
if you’re wondering what temperature is simmer om electric stove setting, most electric stoves simmer around setting 2-3, although the exact setting varies by model.
Please Write Your Comments