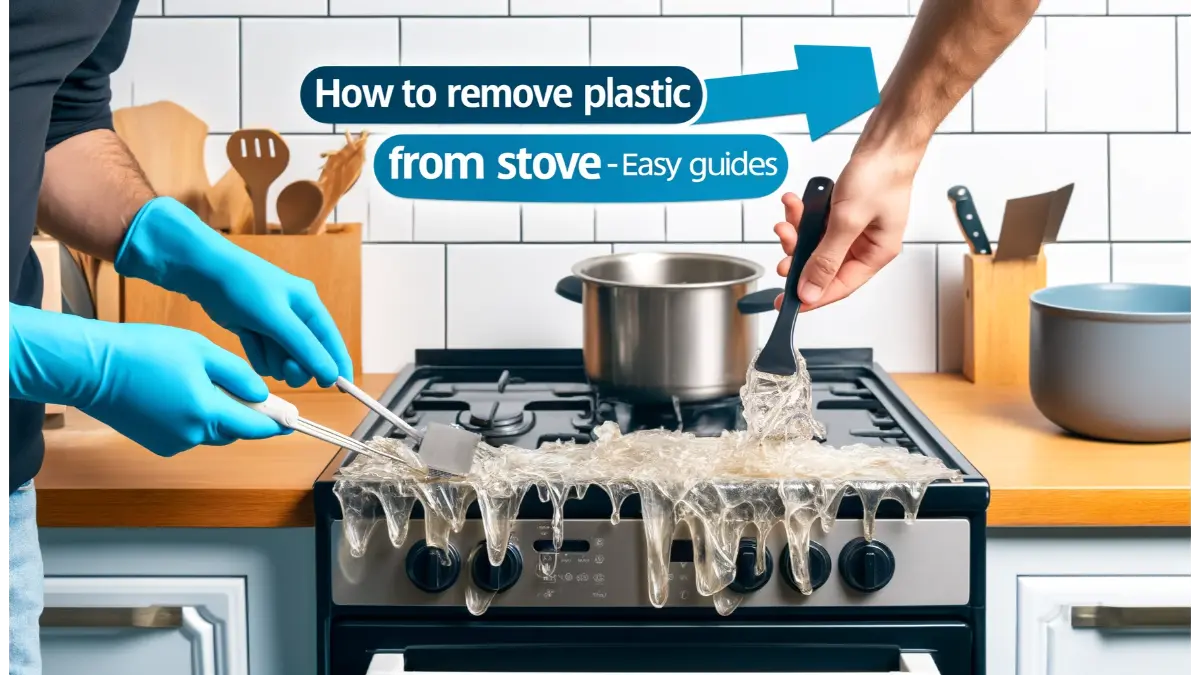
Discovering melted plastic on your stove can be a kitchen nightmare. It’s a situation where a small mishap can lead to sticky, stubborn messes.
Whether it’s a stray plastic bag or a spatula left too close to the burner, that melted plastic can be a headache.
Leaving melted plastic unattended can release harmful fumes and affect the performance of your stove. Prompt action ensures a safer and more efficient cooking environment.

In this blog, you will learn “how to remove melted plastic from your stove top” in 9 effective ways at your home.
Tools and Materials
Before you start tackling that melted plastic on your stove, let’s gather the essentials:
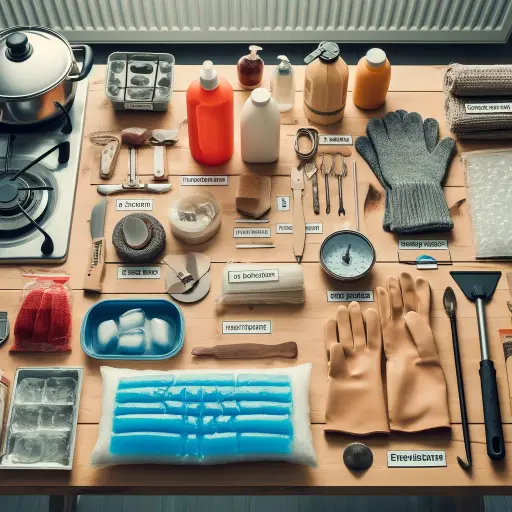
- Plastic Scraper or Credit Card: This handy tool will be your best friend for gently scraping off the melted plastic without damaging the surface.
- Heat Gun or Hairdryer (for some methods): If you opt for the heating approach, these tools will soften the plastic for easier removal.
- Ice Cubes or Freezer Pack (for the ice method): Freezing the plastic requires some ice to harden it for safe chipping.
- Chemical Solvent (if needed): Acetone-based nail polish remover or a citrus-based adhesive remover can dissolve stubborn plastic residue.
- Baking Soda (for the baking soda paste method): Common kitchen staple used to create a cleaning paste.
- Sponge or Cloth: You’ll need this for applying solvents, pastes, or wiping surfaces clean.
- Commercial Adhesive Remover (preferred): Some commercial adhesive removers work effectively for this task.
- Boiling Water (if using boiling water): When plastic adheres to pots or pans.
Assessing the Damage
1. Examining the extent of plastic melt
Before you jump into action, it’s essential to assess the situation and understand the extent of the plastic melt. Here’s how:
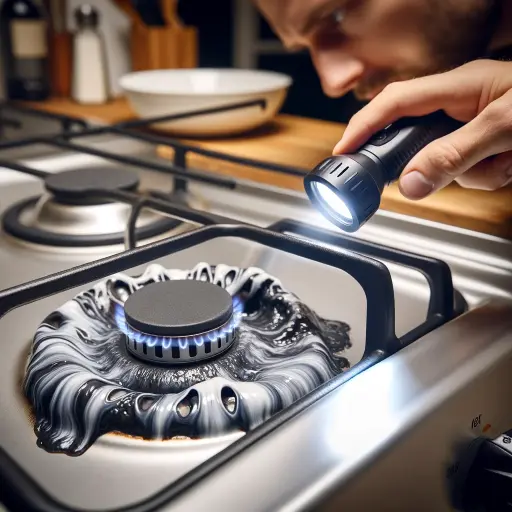
- Visual Inspection: Start by visually examining the melted plastic. Is it a thin layer or a more substantial, melted blob? This will help you gauge the scale of the problem.
- Surface Material: Consider the surface the plastic adhered to. Is it glass, ceramic, or a different material? Different surfaces may require different removal techniques.
- Adhesion Depth: Determine how deeply the plastic has fused with the surface. Is it just on the surface, or has it penetrated deeper into crevices or grates?
- Time Factor: Knowing how long the plastic has been there can be crucial. Fresh spills are generally easier to remove than older, hardened ones.
2. Identifying affected stove components
Once you’ve assessed the extent of the plastic melt, it’s time to identify which stove components are affected. Here’s how:
- Burners and Grates: Check the burners and grates for any plastic residue. These are common areas where spills occur.
- Control Knobs: Inspect the control knobs for any plastic that might have dripped onto them.
- Stovetop Surface: Look at the stovetop surface itself. Plastic can sometimes spill over the edges or onto the surface.
- Oven Racks and Interior: If the plastic has found its way into the oven, inspect both the racks and the interior for any melted plastic.
How to Remove Melted Plastic from Stove
Following are the 9 easy methods to remove melted plastic from the stove.
Method: 1 Scraping with a Plastic Scraper

- Gather Your Tools: You’ll need a plastic scraper (or an old credit card) to do this safely.
- Cool Down the Plastic: Wait for the melted plastic to cool down completely. It should not be hot or gooey.
- Start Scraping Gently: Hold the plastic scraper at a slight angle. Begin gently scraping off the plastic. Be careful not to press too hard to avoid scratching the surface.
- Continue Scaping: Keep scraping until you remove as much plastic as possible.
Method: 2 Heating and Peeling

- Gather Your Tools: You’ll need a heat gun or a hairdryer for this method.
- Heat the Plastic: Turn on your heat gun or hairdryer to the low heat setting. Aim it at the melted plastic and move it back and forth to heat the area. Be patient; it may take a minute or two.
- Peel Carefully: Once the plastic starts to soften, carefully use your fingers or a plastic scraper to peel it away. Reheat the area as needed and keep peeling until the plastic is gone.
Method: 3 Using Ice

- Prepare Ice: Grab some ice cubes or a freezer pack from your freezer.
- Freeze the Plastic: Place the ice directly onto the melted plastic. Let it sit for a while until the plastic hardens. This usually takes about 10-15 minutes.
- Scrape Off: Once the plastic is hardened, take your plastic scraper and gently chip it away. Continue scraping until the plastic is completely removed.
Method: 4 Using Chemical Solvents

- Gather Your Tools: You’ll need an acetone-based nail polish remover or a citrus-based adhesive remover, and a soft cloth.
- Test in a Hidden Spot: Before applying the solvent to the affected area, test it on a small, inconspicuous spot to ensure it won’t harm the surface.
- Apply the Solvent: Dip a corner of your cloth into the solvent, ensuring it’s just damp, not soaking wet.
- Gently Rub: Carefully rub the affected area with the solvent-soaked cloth. Apply gentle pressure to dissolve and remove the plastic.
Method: 5 Using Baking Soda Paste

- Create the Baking Soda Paste: Mix a small amount of baking soda with water until it forms a thick paste.
- Apply the Paste: Spread the baking soda paste over the melted plastic, ensuring it covers the entire affected area.
- Let it Sit: Allow the paste to sit on the plastic for a few hours. This gives it time to work.
- Scrub Gently: After the paste has sat for a while, use a sponge or cloth to gently scrub the area. This should help remove the plastic.
Method: 6 Using Commercial Adhesive Removers
- Choose the Right Product: Select a commercial adhesive remover that matches your needs. Follow the manufacturer’s instructions carefully.
- Apply the Remover: Following the product’s directions, apply the adhesive remover to the melted plastic. Ensure you use the recommended amount.
- Wait as Directed: Let the remover sit on the plastic for the specified time as mentioned in the instructions.
- Scrape or Wipe: After the waiting period, gently scrape or wipe away the melted plastic using a plastic scraper or a cloth.
Method: 7 Using a Razor Blade (with caution)
- Prepare Your Tools: You’ll need a razor blade and a glass or ceramic surface with melted plastic.
- Caution First: Understand that using a razor blade can potentially scratch surfaces, so only use this method on glass or ceramic surfaces.
- Hold the Razor Blade at an Angle: Hold the razor blade at a shallow angle (almost flat) against the surface. Gently and carefully scrape off the melted plastic.
- Inspect and Repeat: Check your progress frequently. If the plastic is not coming off easily, avoid applying excessive pressure. Continue to scrape until all the plastic is removed.
Method: 8 Using Boiling Water
- Prepare a Pot of Boiling Water: Place a pot of water on the stove and bring it to a boil.
- Pour Boiling Water Over the Plastic: Carefully pour the boiling water directly over the melted plastic on the pot or pan. Allow the hot water to soften the plastic for a few minutes.
- Peel or Scrape Off: Once the plastic has softened, gently peel or scrape it off with a plastic scraper or your fingers. Be cautious not to burn yourself with the hot water.
Method: 9 Using Oven Self-Cleaning Mode
- Prepare Your Oven: For oven racks or grates with melted plastic, remove them from the oven.
- Place in the Oven During Self-Cleaning Mode: Put the affected oven racks or grates inside the oven during a self-cleaning cycle. Follow your oven’s user manual to start the self-cleaning process.
- Wait for the Cleaning Cycle: Allow the oven’s self-cleaning cycle to heat up and burn away the plastic. This usually takes several hours.
- Safety Note: Be cautious when using this method, and ensure there are no flammable materials in or around the oven.
- Remove Ash Residue: Once the self-cleaning cycle is complete, carefully remove the racks or grates.
Safety Precautions for Removing Melted Plastic from Stove

Here are detailed step-by-step safety guides for each of the methods mentioned above for removing melted plastic:
Method 1: Scraping with a Plastic Scraper
- Tools Needed: Use a plastic scraper or an old credit card.
- Pressure Caution: Gently scrape to avoid damaging the surface. Check progress regularly.
Method 2: Heating and Peeling
- Heat Source: Use a heat gun or hairdryer on low. Ensure good ventilation.
- Peeling Caution: Move the heat source continuously and peel carefully to prevent burns.
Method 3: Using Ice. Wear gloves to protect against cold. Ensure ventilation to prevent indoor moisture buildup.
Method 4: Chemical Solvents. Work in a ventilated area with gloves and eye protection. Avoid flames and dispose of materials safely.
Method 5: Baking Soda Paste. Use gloves, avoid excess moisture, and dispose of waste properly.
Method 6: Commercial Adhesive Removers. Follow product instructions, ensure ventilation, and wear recommended safety gear.
Method 7: Razor Blade. Only use on glass or ceramic. Maintain a shallow angle with gentle pressure to minimize scratching.
Method 8: Boiling Water. Handle boiling water carefully to avoid burns. Suitable for pots or pans only.
Method 9: Oven Self-Cleaning Mode. Follow the oven’s self-cleaning instructions closely and ensure no flammable materials are nearby.
Tips to avoid future plastic melting incidents
Now that you’ve triumphed over melted plastic, here are some proactive steps to prevent it from happening again:
- Mind Your Cookware: Choose cookware that’s suitable for your stove’s heat source and size to avoid overheating.
- Keep a Safe Distance: Maintain a safe distance between cooking utensils and the stovetop. Be aware of what’s nearby when cooking.
- Stay Attentive: Never leave your stove unattended, especially when using high heat.
- Use Spill Trays for Gas Stoves: A spill tray or a drip pan can help catch spills and drips, reducing the likelihood of melted plastic coming into direct contact with the stove’s burner.
- Use Double Drip Tray for Gas Stoves: A double drip tray or a drip pan with multiple layers can provide added protection against spills and drips reaching the stove’s burner.
Cleaning the Stove After Plastic Removal
Choosing the Right Cleaner
Use a cleaner suitable for your stove’s surface. For glass or ceramic, opt for a specialized stove cleaner; for other surfaces, mild dish soap or all-purpose cleaner works well.
Apply the cleaner as directed on the product’s instructions.
Scrubbing Stubborn Spots
Gently scrub any stubborn residues with a non-abrasive pad or soft cloth. Apply even pressure and be patient, especially with tough residues.
Rinsing and Drying
Rinse the surface thoroughly with clean water to remove any remaining cleaner.
Dry with a clean cloth to avoid streaks and water spots.
Reassembling the Stove
- Replacing Grates and Burner Caps. Securely position the grates and replace any burner caps removed during cleaning.
- Removing Protective Coverings. Remove any coverings or tapes used during the cleaning process before using the stove.
Final Inspection
- Checking for Remaining Plastic. Inspect the stove carefully, focusing on crevices and burner grates to ensure no plastic remains.
- Testing Components. Test all stove components, including burners and oven, to ensure they function correctly.
- Verifying Safety Features. Confirm that all safety features, like gas shut-off valves and indicator lights, are operational.
FAQs
Is it safe to use a heat gun or hairdryer?
Yes, using a heat gun or hairdryer on low is safe to soften melted plastic. Keep the heat source moving and ensure proper ventilation.
Is melted plastic on the stove a common gas stove issue?
Melted plastic on a gas stove is not a common issue if proper cooking practices are followed.
How to remove melted plastic from an electric stove top?
If melted plastic lands on an electric stove top, switch off the burners and unplug the stove. Let the plastic cool, then carefully scrape it off with a plastic scraper. If necessary, use a specialized cleaner for electric stove tops to remove any remaining residue.
How to remove melted plastic from the cast iron stove burner?
For a cast iron stove burner, let the plastic cool and harden. Then, gently scrape it off using a plastic scraper or credit card.
Avoid using water, as it can cause rust on cast iron; instead, use a dry cloth to wipe away any remaining bits.
How to remove melted plastic from the oven?
When plastic melts inside the oven, let it cool and harden. Carefully scrape off as much as possible with a plastic scraper or credit card.
Then, heat the oven to a low temperature (around 200°F or 93°C) to soften any remaining plastic, making it easier to scrape off.
Conclusion
We’ve explored various safe and effective methods, from scraping to using solvents and heat.
Swiftly addressing melted plastic is crucial for safety and your stove’s performance. We encourage you to share your own tips and experiences in the comments. Your insights can help others facing similar challenges, and together, we build a supportive kitchen-savvy community.
So, when melted plastic invades your stove, remember that with the right knowledge and a touch of patience, you can conquer this kitchen mishap and keep the culinary creativity flowing.

