Remove Melted Plastic from Oven
Updated: 30 Apr 2024
567
Have you ever opened your oven to a sticky, smelly mess of melted plastic? Whether it’s from an accidentally heated container or a forgotten utensil, melted plastic can cause a major headache and a potential hazard in your kitchen. Removing this melted mess is not only crucial for your oven’s functionality but also for your health.
In this post, you’ll learn how to safely remove melted plastic from your oven using simple, chemical-free methods that ensure your appliance remains in top shape. We’ll guide you through various techniques, from removing large pieces to dealing with stubborn residues, and share expert tips to prevent future mishaps.
“Cleaning your oven regularly contributes to better efficiency and safety,” according to kitchen maintenance experts. By following the steps outlined here, you’ll not only restore your oven but also extend its lifespan and performance.
What Causes Plastic to Melt in Ovens?
Common Scenarios of Plastic Melting

Accidental Heating: One of the most common reasons for plastic melting in ovens is the accidental placement of plastic utensils or containers inside the oven. Whether it’s a forgotten plastic lid or a misjudged microwave-safe dish, the high temperatures of an oven can quickly lead to melted plastic.
Types of Plastics Prone to Melting

- Polyethylene (PE) and polypropylene (PP): Often used in food containers and kitchenware, these plastics start to soften at temperatures as low as 120 degrees Celsius, which is easily surpassed in an oven’s heating cycle.
- Polystyrene (PS): Commonly found in disposable plastic containers and cups, polystyrene can begin to deform at even lower temperatures. It’s crucial to ensure these materials never find their way into the oven.
Step-by-Step Removal Methods and Preventive Tips

Preparing for the Cleanup
Safety First Before attempting to remove melted plastic from the oven, ensure the appliance is turned off and completely cool. This prevents any risk of burns and allows you to handle the cleanup safely.
Gathering Your Tools For effective cleaning, gather the necessary tools:
- Wooden or silicone spatulas to remove large pieces without scratching your oven’s surface.
- Ice packs to harden the plastic, making it easier to remove.
- Protective gloves to keep your hands safe from sharp edges and chemical cleaners, if used.
Setting the Stage Clear the area around the oven to provide easy access and mobility. Lay down old newspapers or towels to catch any fallen plastic pieces or drips during the cleaning process. This setup not only aids in a smoother cleanup but also ensures your kitchen remains clean.
Removing Large Pieces of Melted Plastic
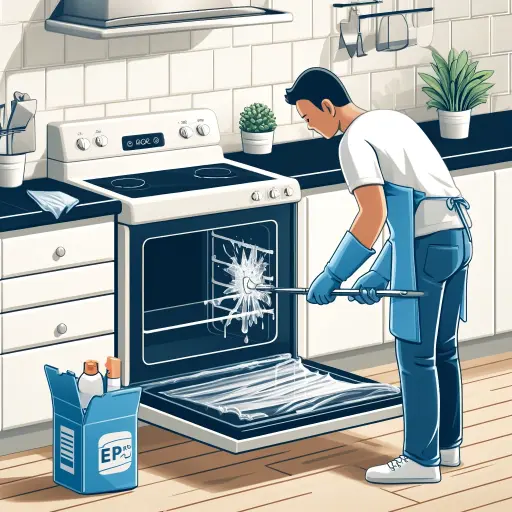
When removing large pieces of melted plastic from your oven, ensure the oven is completely cool to avoid any risk of burns. Using a wooden or high-temperature silicone spatula, gently lift the plastic edges. For larger, more pliable pieces, an application of ice can help stiffen the plastic, making it easier to scrape off without leaving residues.
Cleaning Oven Racks

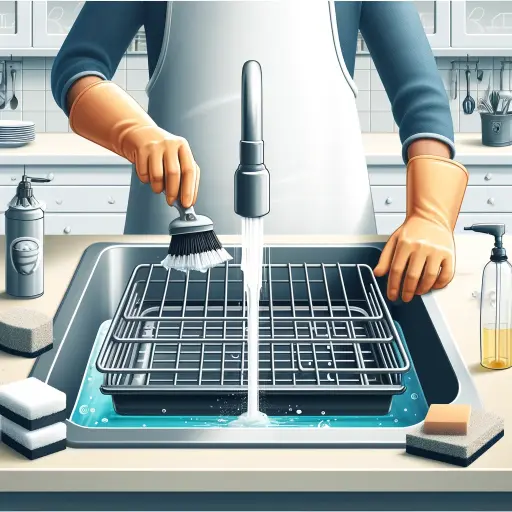
Thoroughly cleaning melted plastic out of oven racks requires patience. After removing the racks, soak them in hot, soapy water in a large container or your bathtub. This soaking loosens the plastic, making scrubbing more effective. Use a non-metallic brush or scrubbing pad to avoid damaging the rack’s finish. For extra cleaning power, add a cup of baking soda to the soaking solution to help break down the plastic.
Chemical-Free Cleaning for Stubborn Residues

If residues persist after the initial cleaning, a baking soda paste is a reliable natural solution. Spread this paste over the affected areas and let it sit for about 20 minutes. The natural abrasive quality of baking soda helps in removing melted plastic residue from oven surfaces. Afterward, use a damp microfiber cloth to wipe the area clean, ensuring all plastic remnants are removed.
Dealing with Plastic Stains on the Oven’s Interior

Persistent stains from melted plastic may require a slightly stronger approach. Mix vinegar and lemon juice in equal parts and apply this solution to the stained areas. This not only aids in removing burnt plastic from oven walls but also acts as a natural deodorizer, tackling any unpleasant smells. Allow the solution to work on the stains for about 30 minutes before wiping it off with a clean cloth.
Final Polishing and Odor Removal

After all residues and stains are removed, polish the interior with a soft cloth dipped in olive oil. This not only gives your oven a new-like shine but also forms a protective layer that makes future cleaning easier. To remove any lingering burnt plastic smell from the oven, leave a bowl of baking soda or activated charcoal inside the oven overnight. These natural substances absorb and neutralize odors effectively.
Aftercare and Preventive Measures

Ensuring Complete Removal
After removing burnt plastic from the oven and cleaning up residues, conduct a thorough inspection to ensure all plastic has been removed. Missing even small pieces can lead to smoke and unpleasant odors during subsequent uses.
Neutralizing Odors
If any odors persist after the cleanup, how to get the burnt plastic smell out of the oven is your next task. Place a container with a mixture of baking soda and water inside the oven, and heat it at a low temperature for about an hour. The baking soda will absorb the odors, leaving your oven smelling fresh.
Routine Checks and Cleaning
Regularly check and clean your oven to prevent future incidents. Establish a routine where you inspect the oven for any foreign objects before each use. Regular cleaning also helps identify potential issues before they become serious.
Educational Tips
Share these tips with all household members, especially those who use the oven frequently. Understanding the risks associated with melted plastic and how to handle such situations can prevent future accidents.
Conclusion: Effective Ways to Remove Melted Plastic from Your Oven
Successfully removing melted plastic from your oven is crucial for maintaining its functionality and ensuring the safety of your kitchen environment. By following the detailed steps outlined in this guide—from preparing for the cleanup to implementing natural, chemical-free methods—you can restore your oven to its pristine condition without compromising your health or safety.
Remember, prevention is just as important as the cleanup. Regular checks and maintenance are key to avoiding similar incidents in the future. Educate everyone in your home about the dangers of melted plastic and the importance of keeping plastic items away from the oven.
If you encounter stubborn residues or persistent odors despite your best efforts, consider consulting a professional cleaner or your oven manufacturer for further assistance. With the right tools and a bit of patience, removing melted plastic from your oven doesn’t have to be a daunting task.
Embrace these tips, and ensure your oven remains clean, functional, and safe for all your cooking adventures. Happy cleaning!
Frequently Asked Questions About Removing Melted Plastic from an Oven
Q1: What are some tips for cleaning melted plastic off an oven?
A1: To clean melted plastic off an oven, begin by letting the oven cool completely. Use a plastic or wooden spatula to gently scrape off the plastic. For any remaining residues, apply a baking soda paste and let it sit before wiping clean. This approach minimizes damage to the oven’s interior.
Q2: How can I remove melted plastic from oven racks effectively?
A2: The best way to remove melted plastic from oven racks is to take the racks out and soak them in hot soapy water. This softens the plastic, making it easier to scrape off. For tougher spots, a nylon scrubber can be effective without scratching the racks.
Q3: What should I do if there’s plastic residue left in the oven after cleaning?
A3: If plastic residue in the oven persists, create a paste of baking soda and water and apply it to the affected areas. Let it sit for 15-20 minutes, then wipe away with a damp cloth. This method helps lift the residue without harsh chemicals.
Q4: Are there any safe methods for oven plastic stain removal?
A4: Yes, for oven plastic stain removal, mixing a solution of white vinegar and water and applying it to the stains can be very effective. The acidity of the vinegar helps break down the plastic residues without harming the oven surfaces.
Q5: How can I ensure the removal of all burnt plastic from my oven?
A5: To ensure all burnt plastic is removed from the oven, use a combination of mechanical removal (scraping) and chemical cleaning (vinegar, baking soda). Inspect the oven thoroughly after cleaning, and run a short heating cycle to see if any smells linger.
Q6: What are the safest plastic removal techniques from an oven?
A6: The safest techniques for plastic removal from an oven involve avoiding harsh chemicals. Use natural cleaners like baking soda and vinegar, and mechanical methods like scraping with wooden or silicone tools. Always ensure the oven is cool and properly ventilated during cleaning.
References
https://www.wikihow.com/Clean-Melted-Plastic-Out-of-an-Oven
Please Write Your Comments